Garlic Aioli – The Creamy, Flavor-Packed Sauce You’ll Love
Prep time: 10mins | 1 Cup (enough for 6–8 servings as a dip or spread)
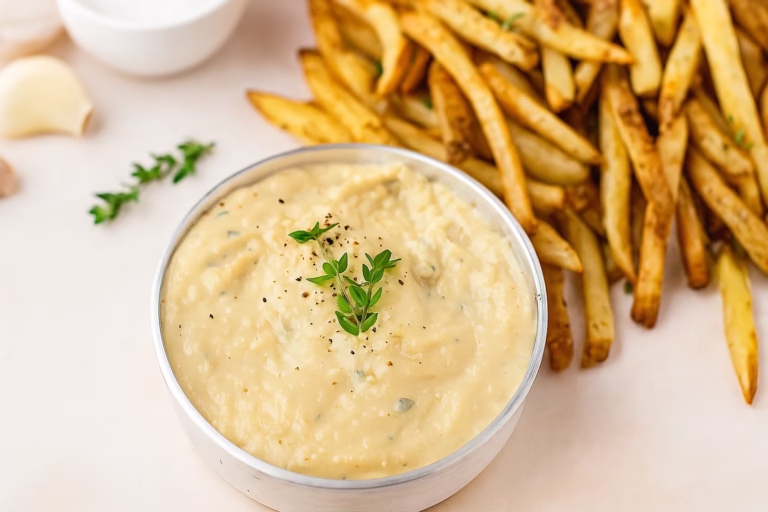
When it comes to versatile condiments, garlic aioli is a true superstar. Creamy, tangy, and bursting with flavor, it has become a favorite dipping sauce, sandwich spread, and burger topping around the world. But what exactly is garlic aioli, and how do you make it at home? In this guide, we’ll explore everything you need to know from its history to a step-by-step recipe, plus clever ways to use it in your kitchen.
10 Minute Creamy Cucumber Salad – Quick, Easy & So Refreshing!
What Is Garlic Aioli?
Traditionally, aioli (pronounced eye-oh-lee) comes from the Mediterranean, particularly Spain and southern France. The word literally means “garlic and oil.” Originally, it was made by grinding garlic and olive oil together until a creamy emulsion formed without eggs or mayonnaise.
Today, most modern versions of garlic aioli include egg yolks, lemon juice, and sometimes mustard to make it smoother and easier to prepare. In simple terms, it’s like a garlicky mayonnaise with extra depth of flavor.
Ingredients
2 fresh egg yolks
3–4 garlic cloves (minced or roasted for a milder flavor)
1 cup olive oil (light, not extra virgin, for better texture)
1 tablespoon lemon juice
1 teaspoon Dijon mustard (optional, for stability)
Salt to taste
Directions
01. Prepare your ingredients
- Make sure the eggs are at room temperature. Cold eggs can prevent the emulsion from forming properly.
- Peel and finely mince the garlic cloves. If you prefer a milder flavor, roast the garlic in the oven until soft and golden before mincing.
02. Start the base mixture
- In a medium mixing bowl, whisk together the egg yolks, lemon juice, and Dijon mustard until smooth.
- This mixture acts as the foundation of your emulsion. The acid from the lemon juice helps keep everything stable.
03. Begin the emulsion slowly
- While whisking continuously, add a few drops of olive oil at a time.
- It’s important to go very slowly at the beginning—if you add too much oil too quickly, the mixture won’t thicken and may separate.
04. Increase oil gradually
- Once the mixture starts to thicken, you can begin adding the olive oil in a thin, steady stream while whisking constantly.
- If you’re using a food processor or immersion blender, keep the motor running and drizzle the oil slowly for the same effect.
06. Add the garlic
- When about half the oil has been added, whisk in the minced garlic. This ensures the flavor distributes evenly without breaking the emulsion.
07. Finish the emulsion
- Continue adding the remaining olive oil, whisking until the aioli becomes thick, creamy, and smooth.
- The texture should be similar to mayonnaise but slightly lighter.
08. Season and adjust
- Taste the aioli and add a pinch of salt.
- If you prefer more tang, add an extra squeeze of lemon juice. For a stronger flavor, stir in another clove of garlic.
09. Chill before serving
- Transfer the aioli to a clean jar or container and refrigerate for at least 30 minutes before serving. This allows the flavors to meld together.
Quick Blender Method (Shortcut Version)
If you’re short on time, you can use this easy method:
Place 1 cup mayonnaise, 2 minced garlic cloves, and 1 tablespoon lemon juice in a blender.
Blend for 10–15 seconds until creamy.
Chill and serve as a quick garlic aioli.

Variations of Garlic Aioli
One of the best things about aioli is how customizable it is. Try experimenting with these tasty twists:
Spicy Garlic Aioli – Add sriracha or cayenne pepper.
Herb Aioli – Mix in fresh parsley, basil, or dill.
Roasted Garlic Aioli – Roast garlic cloves until caramelized for a sweeter flavor.
Truffle Aioli – Stir in a splash of truffle oil for a gourmet touch.
Health Benefits of Garlic Aioli
While aioli is rich and indulgent, it can also bring some health benefits, especially if made with olive oil and fresh garlic:
Garlic – Known for its antibacterial properties and immune-boosting effects.
Olive oil – A heart-healthy fat full of antioxidants.
Homemade freshness – No preservatives or artificial ingredients.
Of course, moderation is key, as aioli is calorie-dense due to its oil base.
FAQ's on Garlic Aioli
1. How long does garlic aioli last in the fridge?
Homemade aioli should be stored in an airtight container and consumed within 3–4 days for freshness.
2. Can I make garlic aioli without eggs?
Yes! For a vegan version, blend garlic, olive oil, lemon juice, and a splash of plant-based milk. Aquafaba (chickpea water) also works well as an egg substitute.
3. Is garlic aioli gluten-free?
Absolutely. Garlic aioli is naturally gluten-free, making it safe for those with gluten intolerance.
Final Thoughts
Garlic aioli is more than just a condiment. It’s a flavor enhancer that can transform simple meals into something extraordinary. Whether you make it the traditional way with garlic and oil or opt for the modern egg-based method, it’s guaranteed to become a staple in your kitchen.
Authentic Italian Carbonara Recipe – A Classic Roman Delight

Pingback: Refrigerator Pickles - Easy Crunchy Pickles Without Canning
Pingback: Lemon Herb Chicken Rice - A Flavor-Packed One-Pot Meal